For the longest time, I have been wanting an alphabet construction set for the kids. But, I just haven’t been able to talk myself into spending what these cost…$40 for a toy is just a bit out of my comfort zone. While I haven’t yet figured out how to create a set that would work on the light table

In the last 5 years, my family has moved a lot. So much, that is almost an understatement. Because of this, we have a ton of cardboard boxes. The idea to build this ABC kit came to me while I was working on breaking down that pile of boxes. My son has not stopped playing with these since they dried!
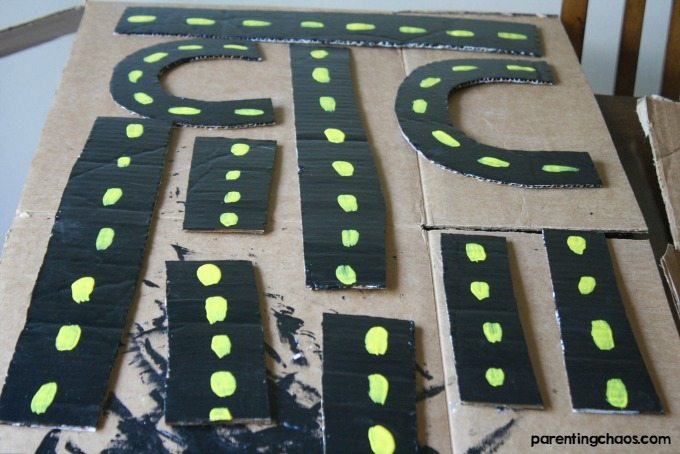
How to make an Alphabet Road Construction Kit
Items Needed:
- Cardboard Box (we used one medium moving box, but any would work. You could even use cereal boxes!)
- Gesso
- Acrylic Paint
- Paint Brushes (these paintbrushes
are perfect for little hands)
- Scissors
- Hot Wheel Cars
Directions
- To start, I opened up our box flat and cut the pieces during nap time. You are going to cut four different shapes: long line, short line, big C, and little C. Every letter of the alphabet can be made using a mixture of those four shapes (plus a dot for i and j). When you are cutting make sure to do at least 4 of each shape. I did quite a lot more (about 60 total) because I wanted something we could eventually spell words with.
- After all your pieces are cut, prime with Gesso. You can skip this step but your colors might not be as vibrant. Lay out to dry.

- Once all your pieces are prepped and dry, let your kids paint! I let my kids add-on the black paint and then I added on the yellow dashes. Set aside to dry again (it took about 45 minutes).
- Play! If needed, you could also seal these in a clear masking tape to help them hold up longer.


As soon as we pulled these out to play, Q jumped right in and started building roads. It didn’t take him long to connect that a circle looks like an O…then we were off.

He made X’s and T’s and a whole bunch of Q’s.

He immediately remembered the Handwriting Without Tears program

We were even able to explore the features and sounds of some new letters without resistance. We had way too much fun with this!
Share This!

